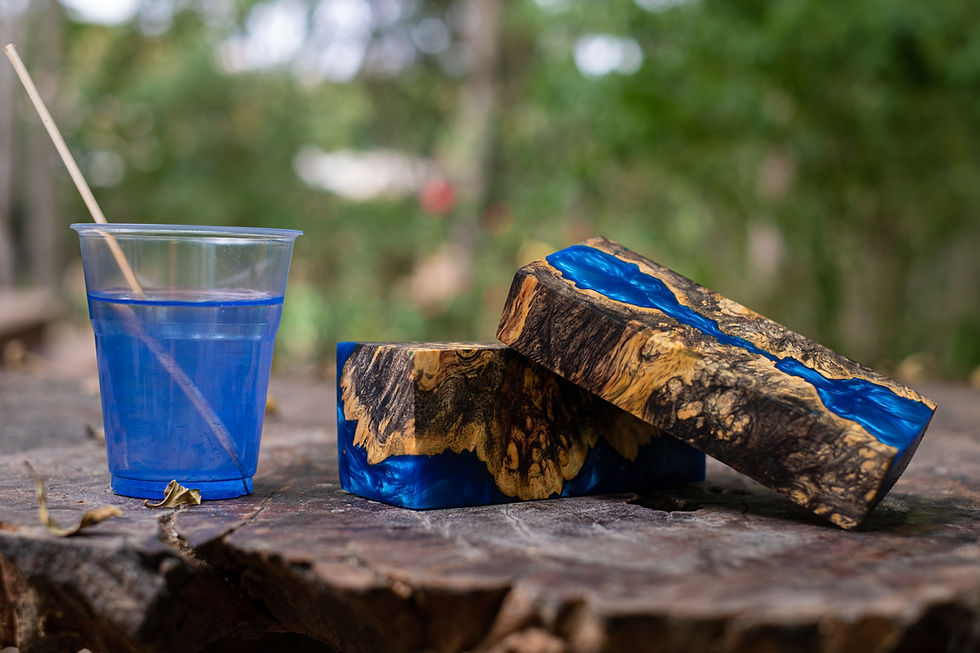
Ready to Add Some Color to Your Live Edge Slab?
- AgainstTheGrain

- Apr 23, 2021
- 4 min read
Updated: Feb 28, 2024
Every Live Edge slab is unique; in fact, no two are alike. Grain patterns, knots, and curves create a one-of-a-kind look that can't be compared to anything else but, did you know that you can add even more character and uniqueness to Live Edge wood? Two words: Epoxy Resin.
Epoxy Resin, often called "liquid plastic", is defined as a group of reactive prepolymers and polymers which contain epoxide groups (see full definition here). After being mixed and poured, a chemical reaction occurs between the compounds which results in a cured form, Epoxy.
Widely used when working with Live Edge wood, epoxy offers you, as the wood artist, the ability to add more character to the wood along with structural integrity.
When working with epoxy resin, there are two main types, each with their own purpose.
Table Top Epoxy Resin
Coming in a 1:1 ratio, table top epoxy resin is a two part mixture used in minor details with Live Edge wood. Pouring with a consistency like honey, table top epoxy resin cures fast and allows the mixture to settle and self level in the void.

Application: Minor, shallow voids (typically < 1/4" thick)
Best Used For: Bug holes, knots, cracks, engravings, shallow molds, etc.
Curing Time: Varies across brands, but on average 3-12 hours.
Deep Pour Epoxy Resin
Produced in a 2:1 ratio, deep pour epoxy resin is a two part mixture used in larger applications with Live Edge wood. Pouring with a consistency like water, deep pour epoxy resin takes additional time to cure so that the heat is evenly distributed throughout the process and a "flash cure" (curing quickly causing the epoxy to crack) doesn't occur.

Application: Large, deep voids (typically up to 2" thick)
Best Used For: River tables, large slab repair, wall art, coasters, serving trays, bar tops, etc.
Curing Time: Varies across brands, but on average 36-72 hours.
Both types of epoxy resin can be left clear for a minimal look and feel, or they can be colored with a liquid dye or dry pigment. Coloring options are absolutely endless - everything imaginable is available. If you are looking for a matte vs sparkling effect, there are also different pigment styles you can choose from.
When coloring epoxy, following the epoxy resin guidelines is essential because adding too much coloring can affect the curing process. A little coloring goes a long way, especially when working with large batches. As a word of caution, the color of the pigment may vary slightly depending on the amount used and the brand of epoxy resin.
Tips & Tricks When Working with Epoxy Resin
Prepare: Epoxy resin will go everywhere - and we mean everywhere - while you are mixing and pouring. A little drop here and a little drop there will soon add up. Prepare your work area with plastic drop cloths, rags and/or paper towels, and rubber gloves for your own protection.
Measure: Measuring buckets are the easiest way to measure epoxy resin when pouring. Whether you are working with a 1:1 or 2:1 ratio, know the desired amount for each part, write it down, and then start pouring.
Mix: Most epoxy resins suggest a mixing time of 5 minutes to ensure the mixture is completely blended. Follow the guidelines for the brand you are using. When working with smaller batches, reusable silicon spatulas work well to mix or disposable wood sticks. For larger batches, using a paint mixer and drill will save on time (and arm soreness) while ensuring a proper mix.
Secure: Hold the bucket! It sounds silly, but properly securing your cup or bucket while mixing will save you a lot of cleanup in the end.
Control the Temperature: The curing process for epoxy resin requires a specific temperature range for optimal results. A work space that is too cold or too hot may have detrimental results to your project, so make sure to follow the guidelines on the brand/type of epoxy resin you are using.
As your epoxy cures, you will see the pigment shimmer changing. This will happen quickly with table top epoxy and slower with the deep pour epoxy. Each pattern is different, but often the table top epoxy will show more of a consistent pattern while deep pour epoxy will give you a "swirl" effect. You can manipulate the pattern to a certain extent by mixing periodically until its' cured, but your results will still vary and if you wait until the epoxy is "gelled", mixing will no longer be feasible.
If you are working with Live Edge wood, knowing how to use epoxy resin will take your skill level to the next level. Between adding a touch a color and structural integrity, it's a great addition to any piece. Before you get started though, we cannot stress enough - PRACTICE. Start with small pieces and work your way up to larger scale projects. Epoxy resin can be finicky and each project will present its' own challenges, but if you keep working with it and have FUN, you'll be an epoxy pro in no time.
To take a look at some of our suggested products to get you started, visit our recommended supplies.
Cheers,
AgainstTheGrain Woodworking
Dream It. Do It. Believe In It.
Sign-up to be notified when we post new articles!
The information provided is the opinion of AgainstTheGrain Woodworking, LLC and is only intended to provide guidance and give recommendations based off of our experience. AgainstTheGrain Woodworking, LLC is not liable for any outcomes related to the information provided.


Comments